
Monorail Upgrade in O Gauge
by Charles R. Hentz
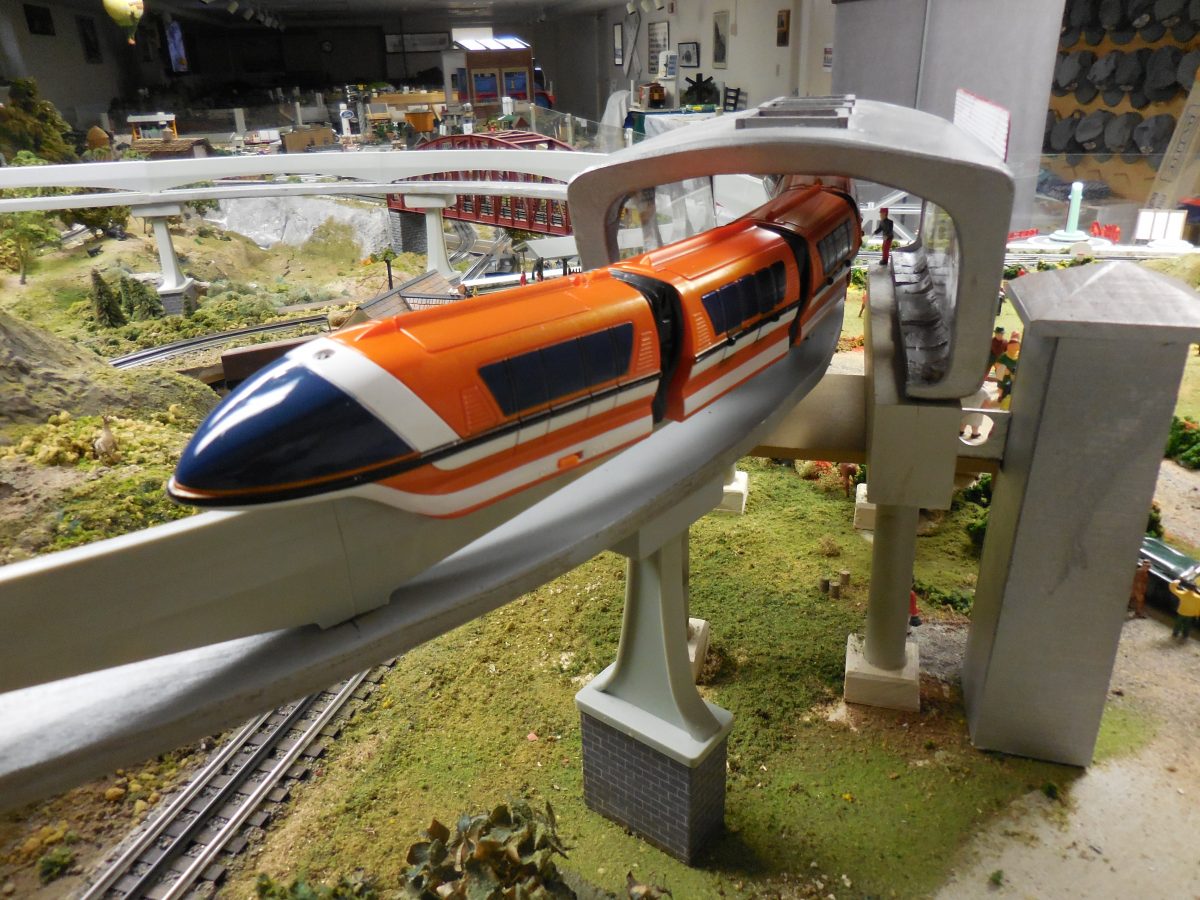
In June of 2018 the Garden Spot Village Train Club acquired a Disney Land O gauge Monorail set complete with track and supports. Bill George built the monorail station to scale from a picture we had. After we built some straight sections using wood shaped to match the profile of the monorail track, we connected the sections together using green grounding clips used for old metal electric boxes . These were bent open slightly and held the sections tightly end to end. That allowed us to place the supports anywhere instead of where two sections joined together. The track and supports were installed into the layout to connect the hotel at the rear with the town in the front in November of 2018.
The Disney Land Monorail was controlled by a infrared beam from the controller at a maximum distance of two feet. It had one speed (slow) and sound announcing the arrival at the station. Sometimes after stopping on the loop, we could not get going again due to the distances over the two feet needed by the controller. This was not acceptable operation for our club. In January of 2020 after reading on the internet how some modelers were installing other motors and radio control, we decided to do the same. We gave up the sound requirement since that can be installed below our station, activated by push buttons and have announcements related to our layout and not about Disney Land.
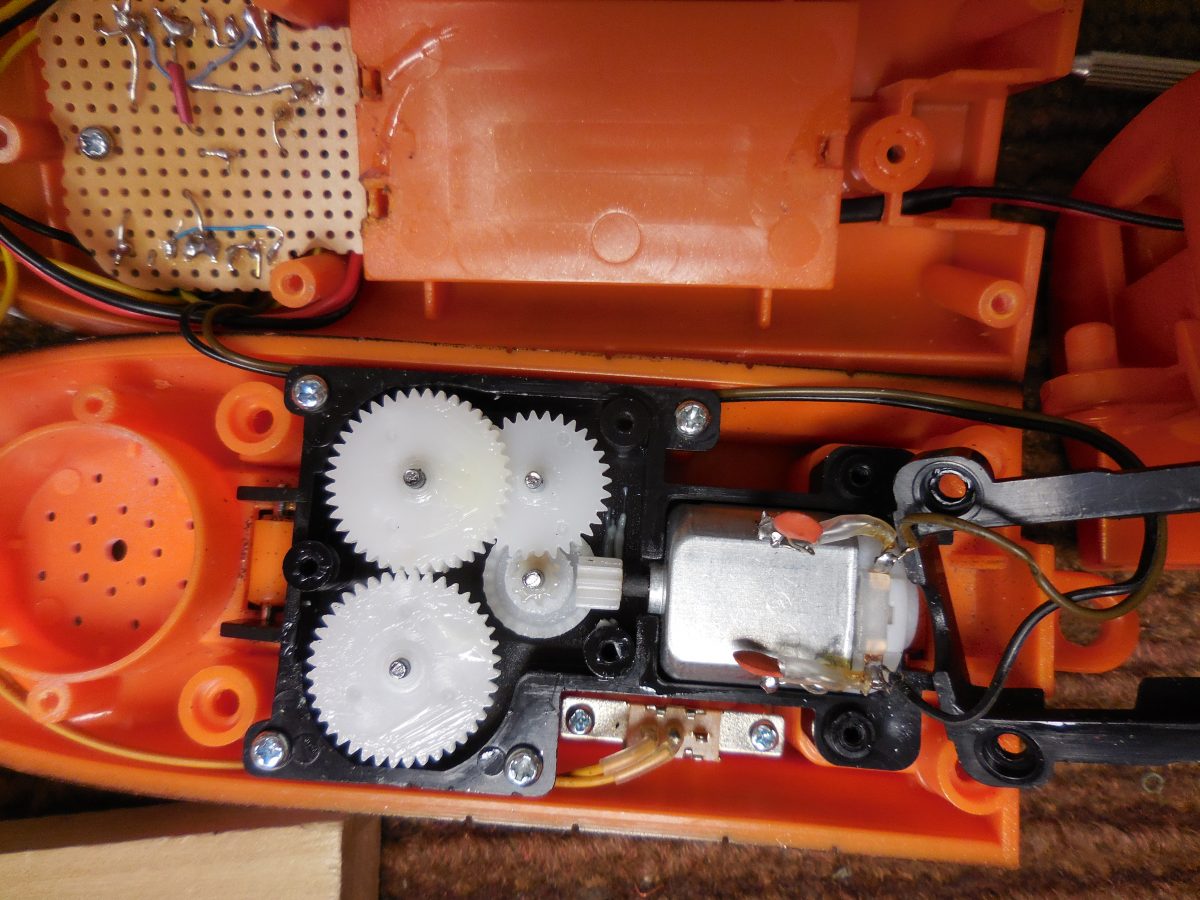
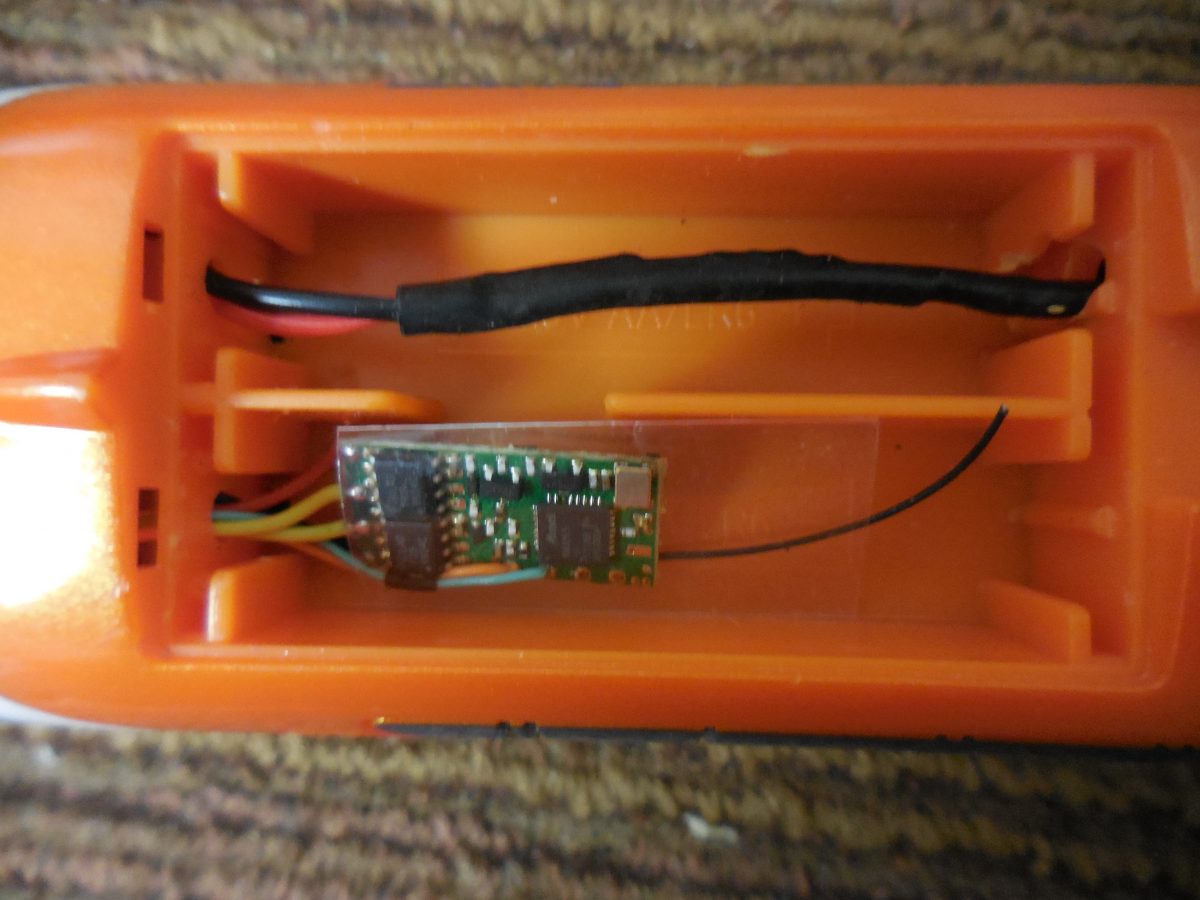
Our first task was to remove the old motor, circuit board, speaker and battery clips. A new motor was installed and the two capacitors from the old motor. The new motor has carbon brushes and probably does not need the capacitors but just in case these were reused. In the second car back we cut the seat backs to the floor to allow ample room for the battery, charger and USB connecting cable (6 inch). Holes were drilled from the old battery compartment to the front section and into the second car for the power from the battery charger circuit board to the front new bare Perfboard. The old switch was incorporated into the new circuit. Two very small terminal strips were attached to a small custom fitted Perfboard and a hole carefully lined up to the old screw post. All the necessary wiring, transistor, red blinking LED and resistors are mounted to this Perfboard.
The Deltang Tx20 Controller and the Rx60 receiver were selected as the best fit for this application. The Adafruit ID: 2010 Lithium Polymer 3.7V 2000mAh battery fits nicely in the bottom of the second car with the Adafruit ID: 259 USB Lilon/LiPoly charger- v1.2. There is even room for the six inch USB cable and plug. Estimating that the motor draws only 250 mA, we should be able to run continuously for four hours. We must remember to turn on the controller first and then the receiver so the receiver does not start to search for a signal.
A LM3914 VOLTMETER MODULE was added to the next car so that the voltage on the battery could be determined by ten blue LEDS on a bar display. These were wired so that only one was on at a time starting at the front with 4.2V for full charge and moving towards the rear for 3.0V. At this voltage the USB charge circuit cuts power to the load.
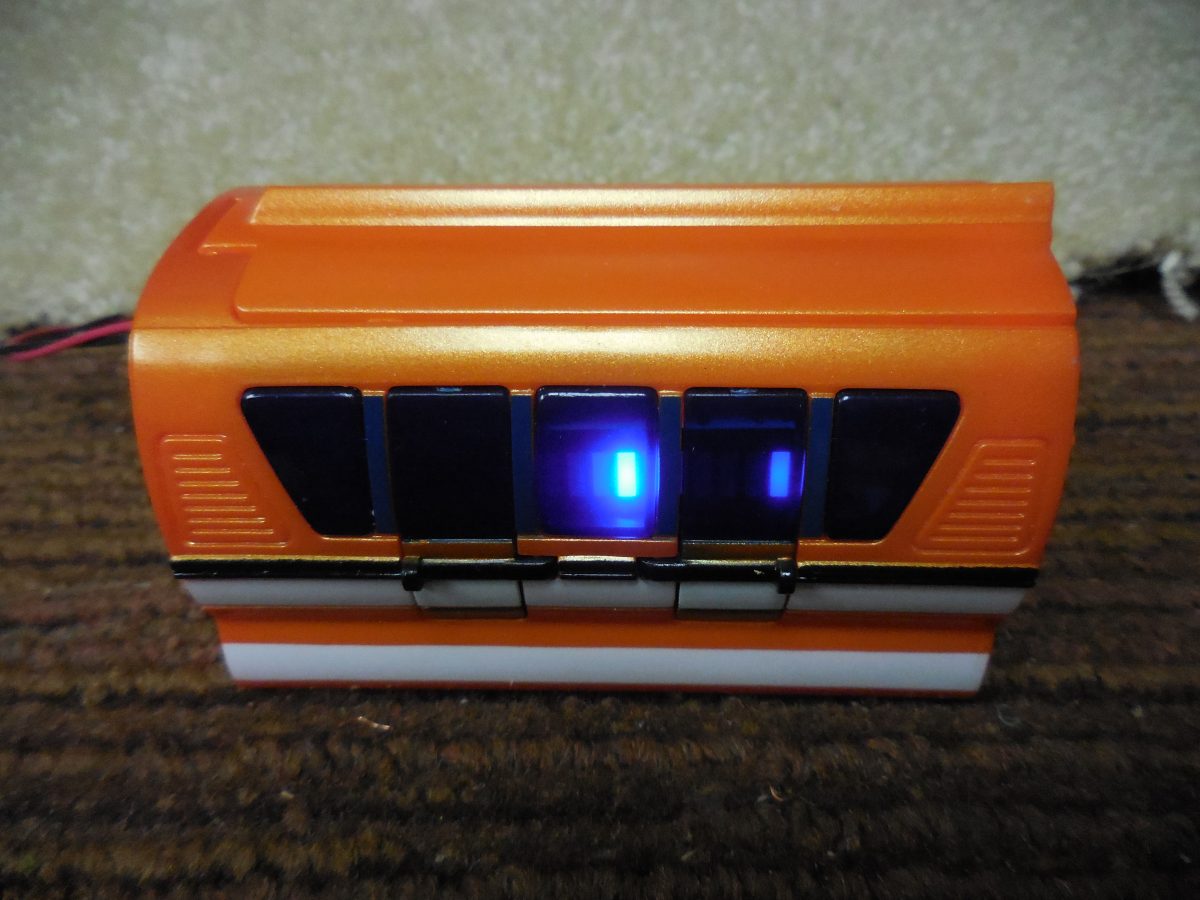
The new system works reliably and we love the control of the more realistic speed . We can now slow down as we come into the station.
We have installed one Adafruit ID: 2133 Audio FX Sound Board WAV/OGG trigger with 2 MB of flash memory which operates on 5VDC. The eleven different sound bites can be selected with a rotary switch and activated with a push of a button. We found some real mono rail safety dialog on the internet and using text to speech software, we were able to incorporate our own announcements as well. Using Audacity software, we converted these files to .ogg format. This saves a lot of memory and sounds just as good as the .wav files. This stereo audio goes to computer speakers at the front of our layout near our monorail station. One nice feature of this board is the ease of changing our files and then uploading through the USB port to the board.
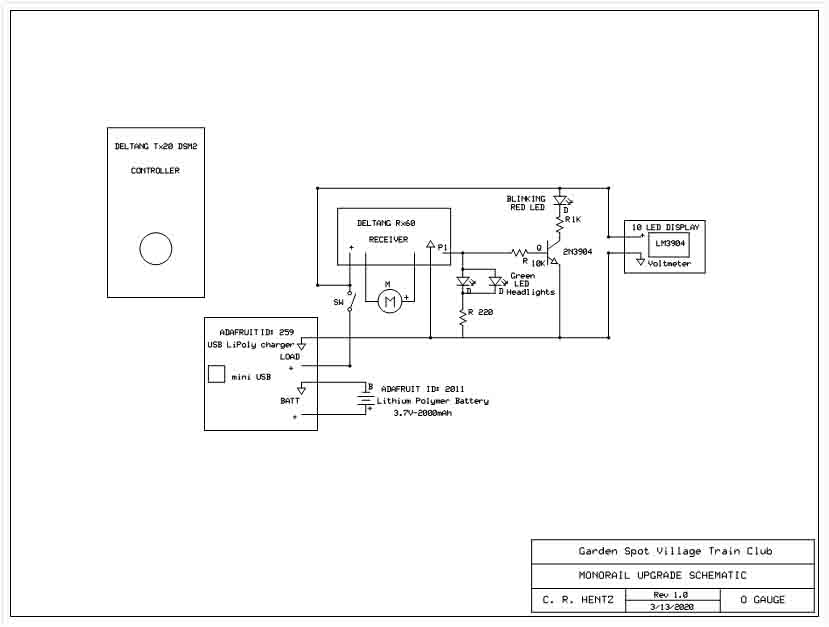
Monorail Upgrade Schematic

Monorail Layout
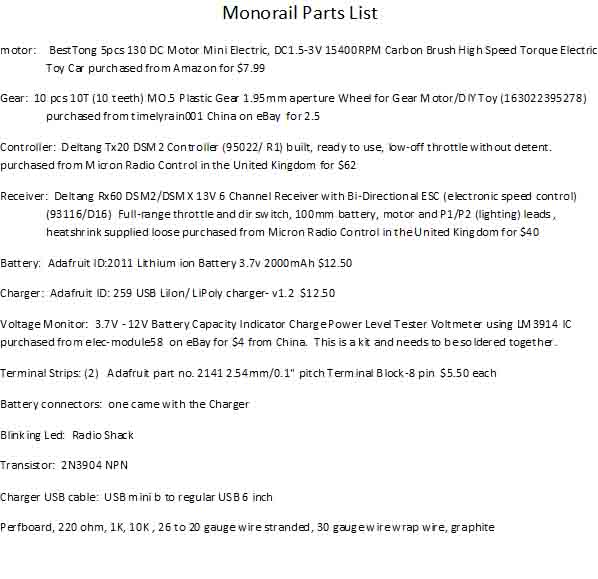
Monorail Upgrade Parts List
Original Monorail
Before Upgrade

Monorail Station
Custom Built by Bill George
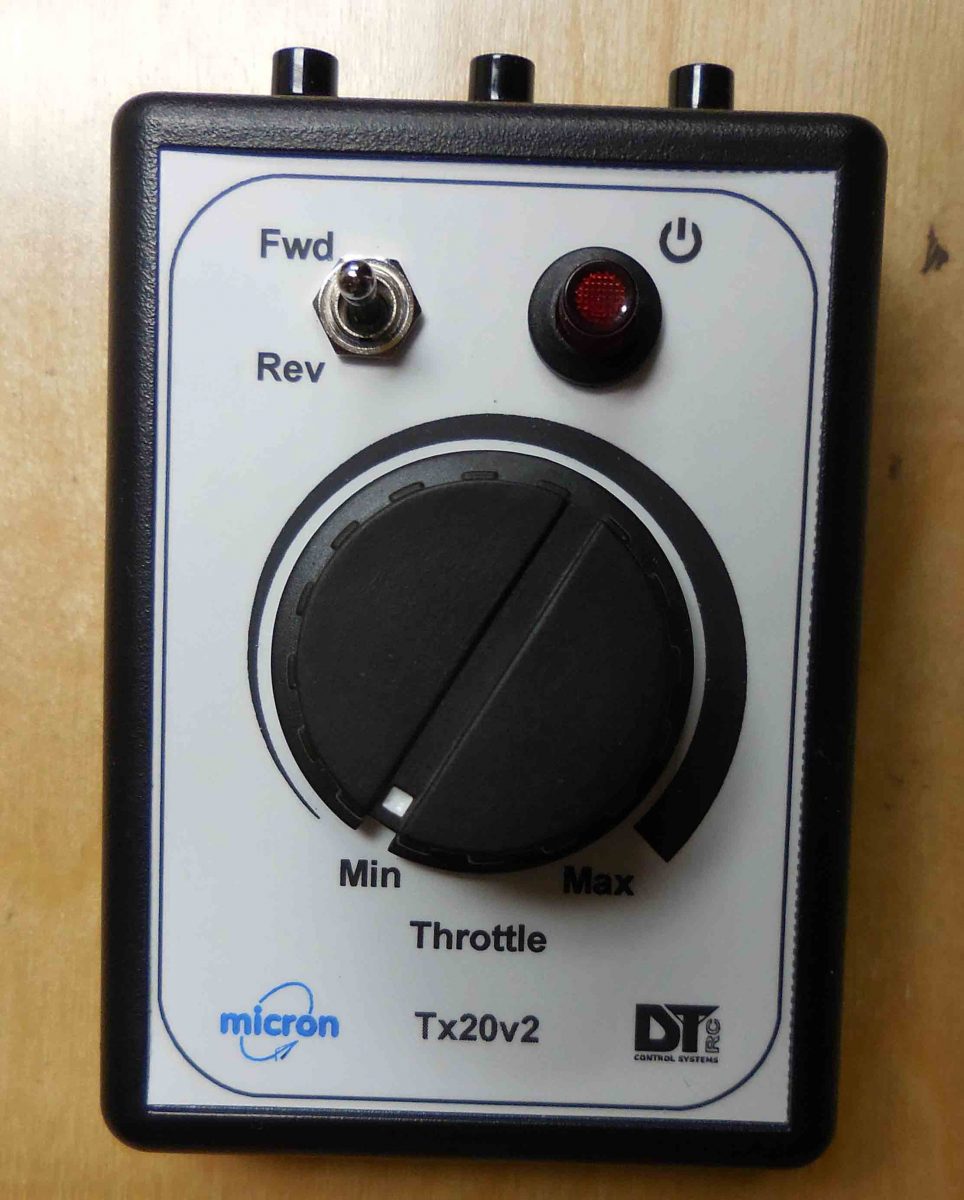
Controller Deltang Tx20
from Micron Radio Control in the U.K.

Bottom View
Remove 5 Screws to Open
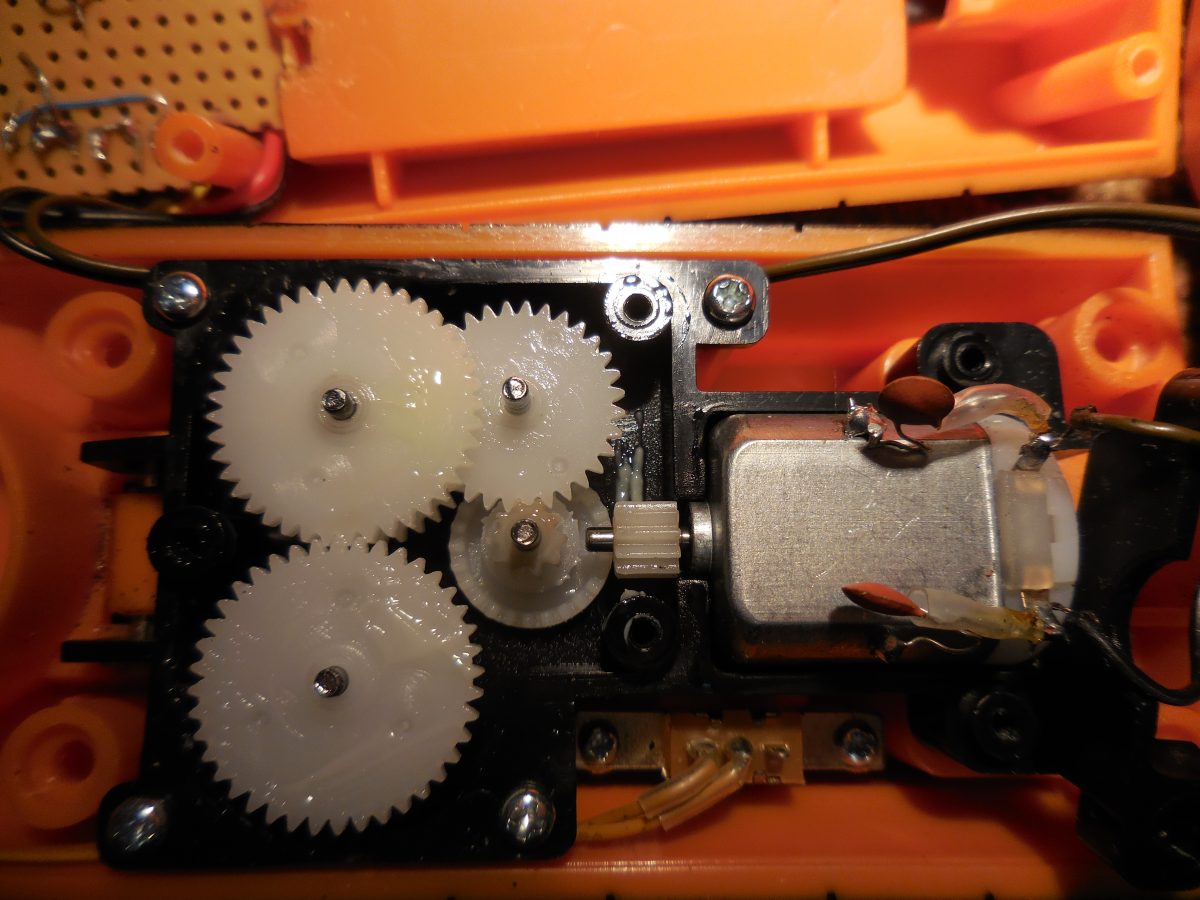
Gear slid back
Needs shrink wrap spacer
Gears with sleeve spacer
Made from Shrink wrap Tubing

Open with Perfboard Installed

Perf top open side
Perfboard Top at angle
Cab with lid removed
Receiver in Old Battery Space
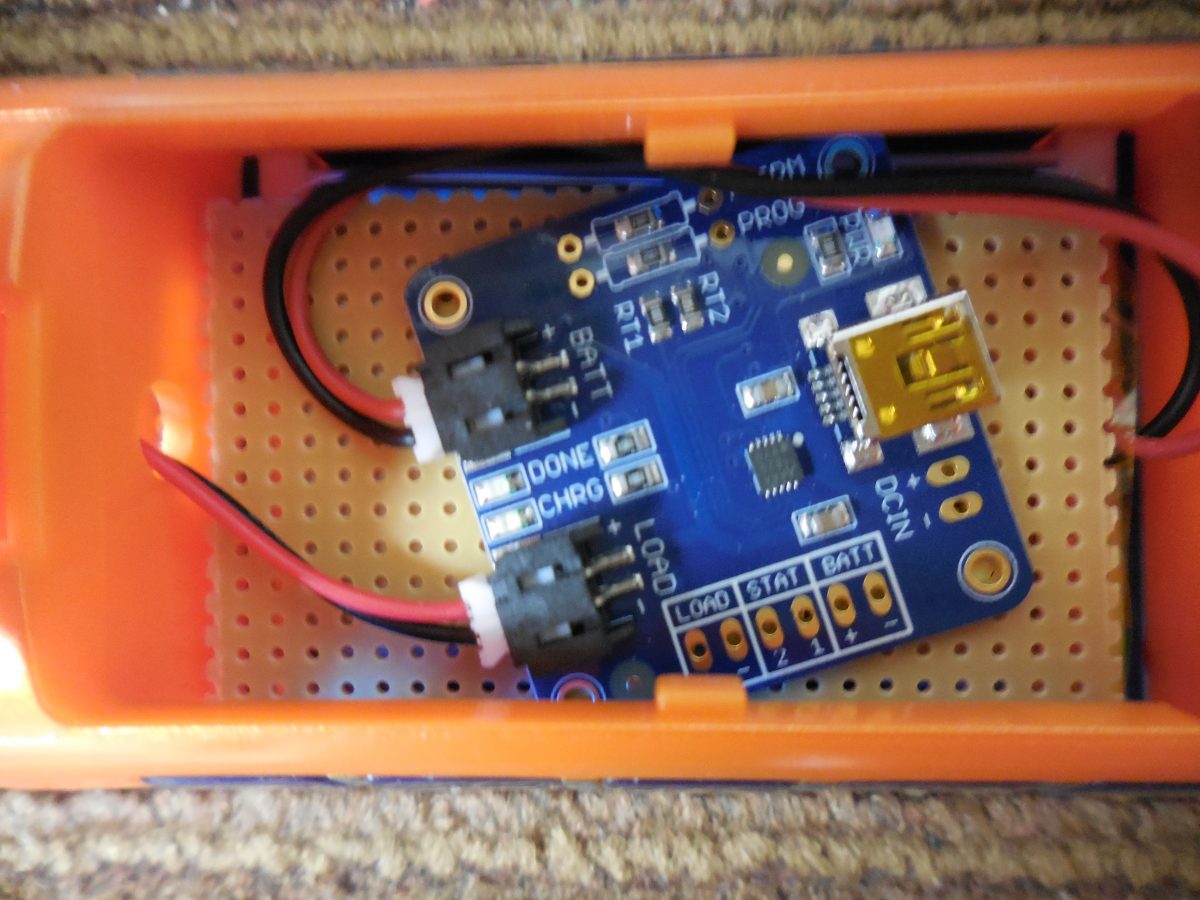
Battery and Charger
Perfboard Separator
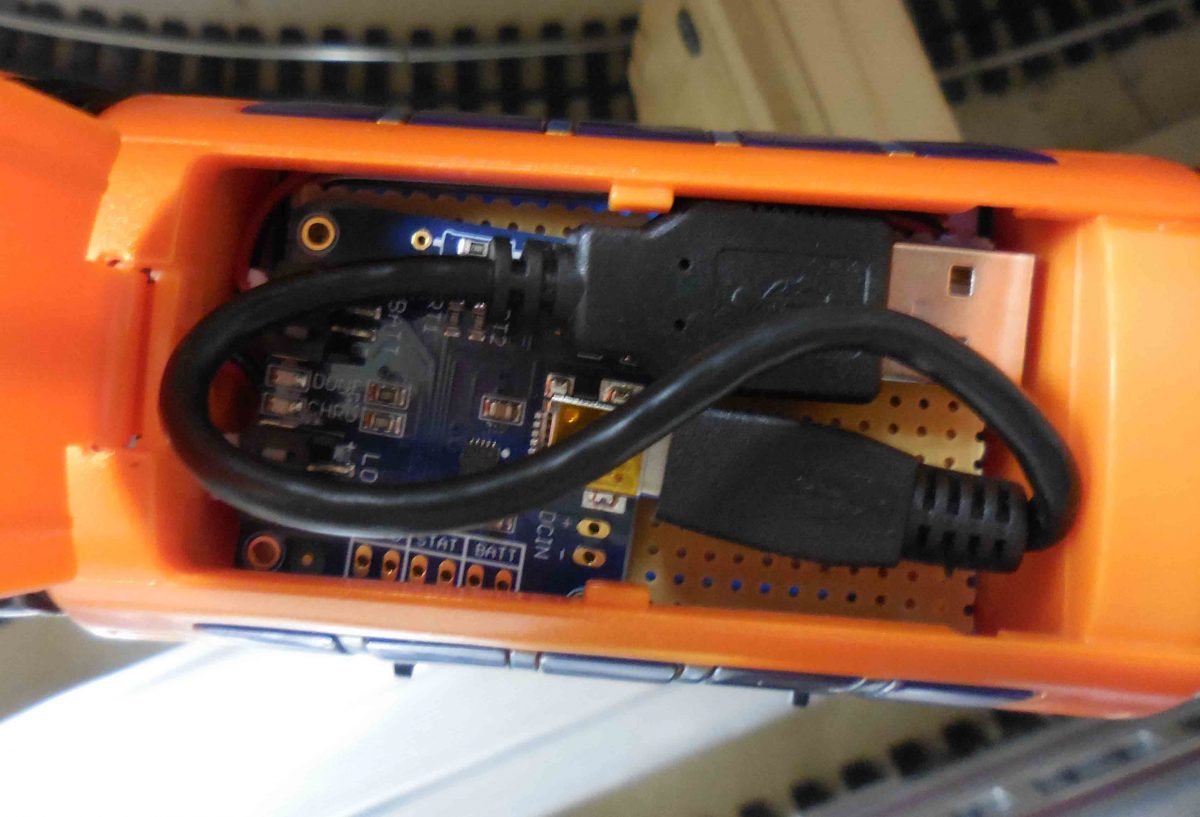
Car 2 with USB cable
Adafruit USB Charger and Battery under Perfboard
Voltmeter Side View
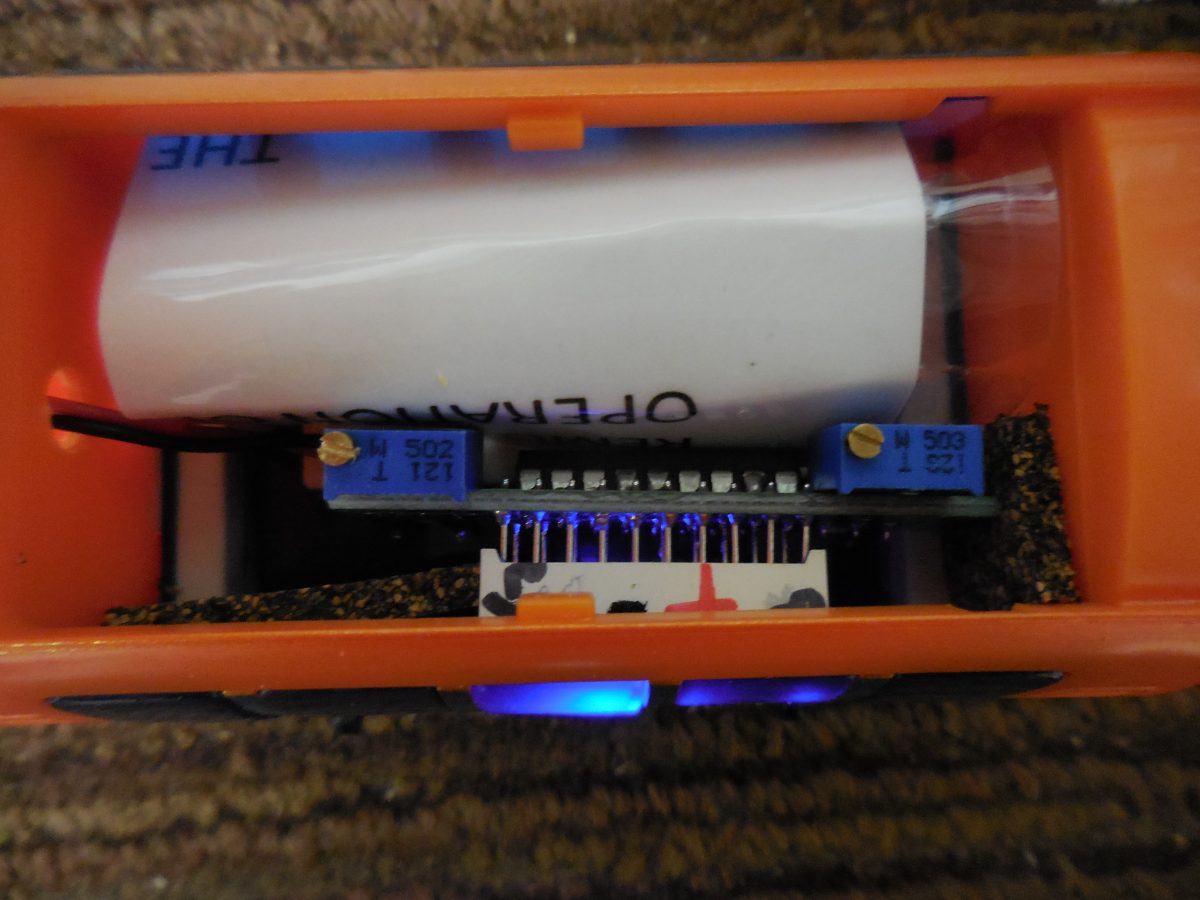
Voltmeter Top View
drive gear
Notice Crack